
Retrofit Wall Insulation in Existing Walls
Retrofit wall insulation is where insulation is added into the walls after construction or with no access to the inside of the wall. This is different to insulating a wall when there is access because special equipment is needed to get inside of the wall. It is also much more difficult with more to go wrong, which is why it's so important to hire a reputable company with well trained technicians.
Depending on the house and the specific circumstances, it may be possible to add insulation into the existing walls. It may not always be recommended. For example, if there is existing insulation in the wall, it can significantly limit the amount of insulation that can be added, greatly reducing the results of the work.
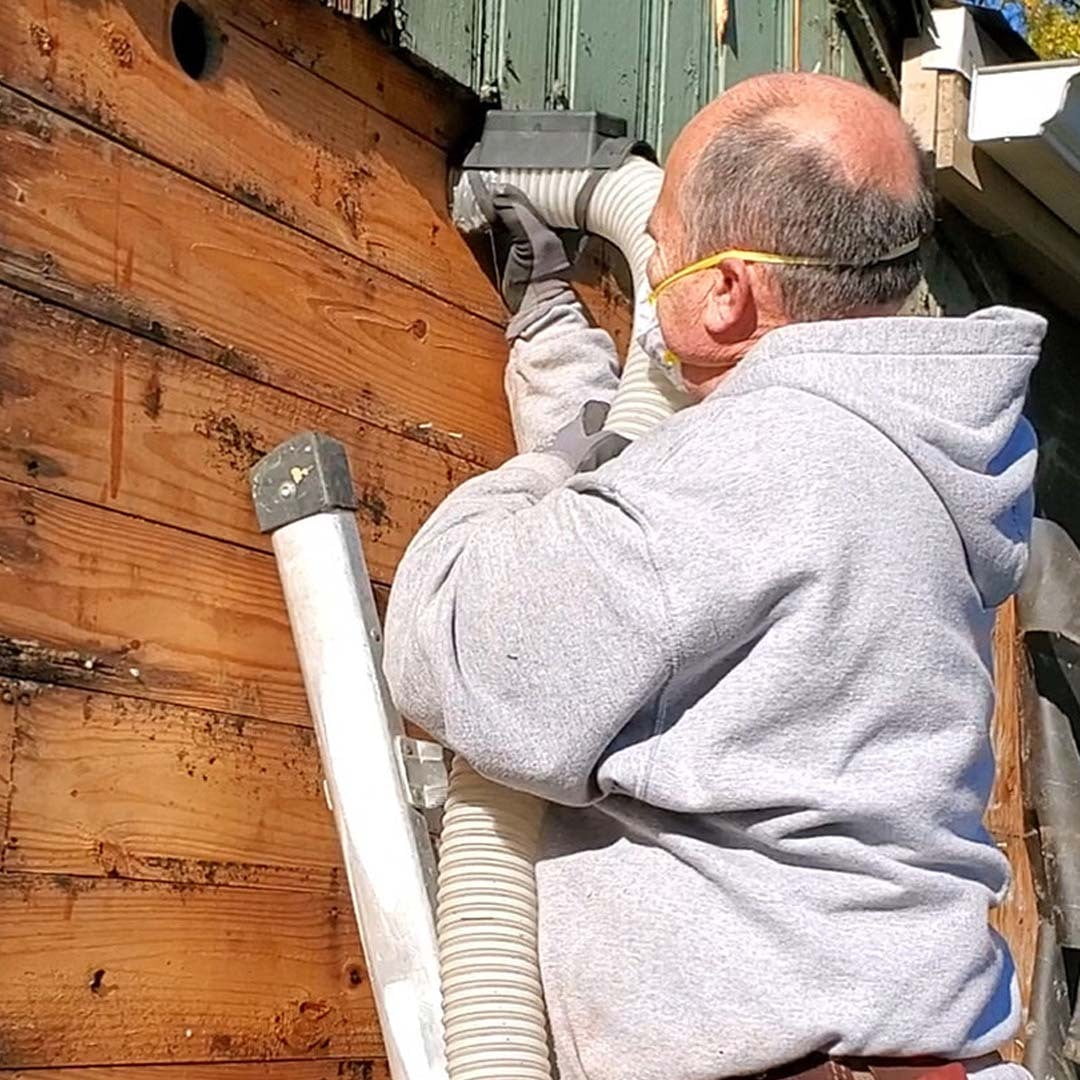
Another factor is where the wall is accessed from. Typically, with a house with vinyl siding we can install the insulation from the outside which means there will be no visible damage to repair. If the house does not have vinyl siding, it likely means holes will need to be cut on the inside of the house.
Our Wall Insulation Process
1. Determine if the holes should be cut from the inside or outside
It is usually best for us to drill holes from the inside. It works better for putting the insulation in. That being said, when the holes can be drilled from the outside we do that since no patching work would be needed.
2. Drill 2 inch circular holes for each stud bay at approximately face level
We need to access the open area between each beam, so we need to cut at least one hole for each space. That most commonly means a hole for every 16 inches
3. Fill the holes with insulation
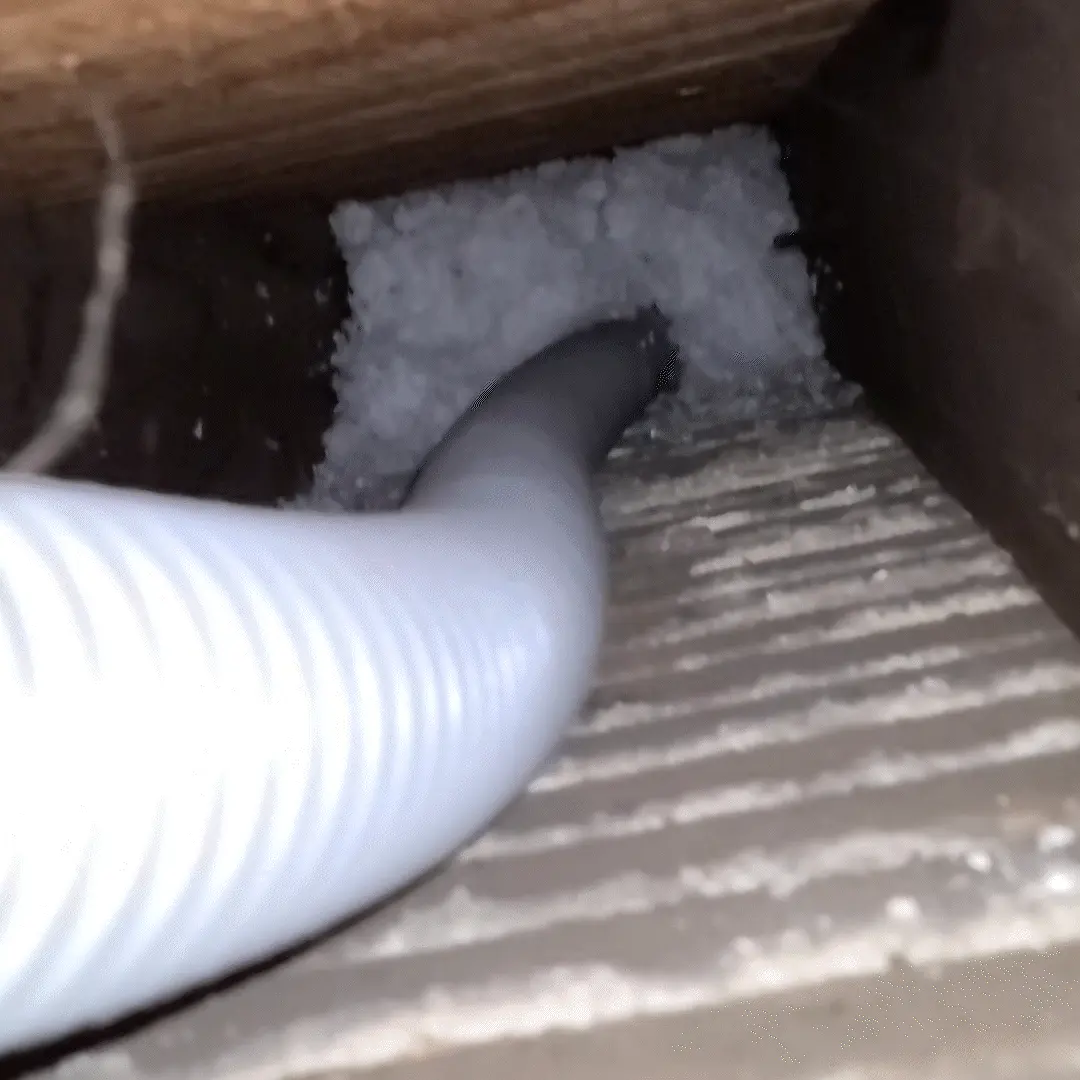
We use a special nozzle with a special machine called a blower to fill the wall tight with insulation. The blower we use is rated for dense packing insulation, which is important because some blowers companies use aren't powerful enough to install insulation inside of walls.
4. Drill Some more holes to check for full coverage
We will drill extra holes to make sure we are getting full coverage in the space. If needed we will drill another hole everywhere to get enough insulation inside of the walls. We typically do the first hole higher because it is easier to push the insulation down the wall than up the wall (thanks gravity!). If the weather is right, we can also use a thermal camera to make sure we aren't missing any areas
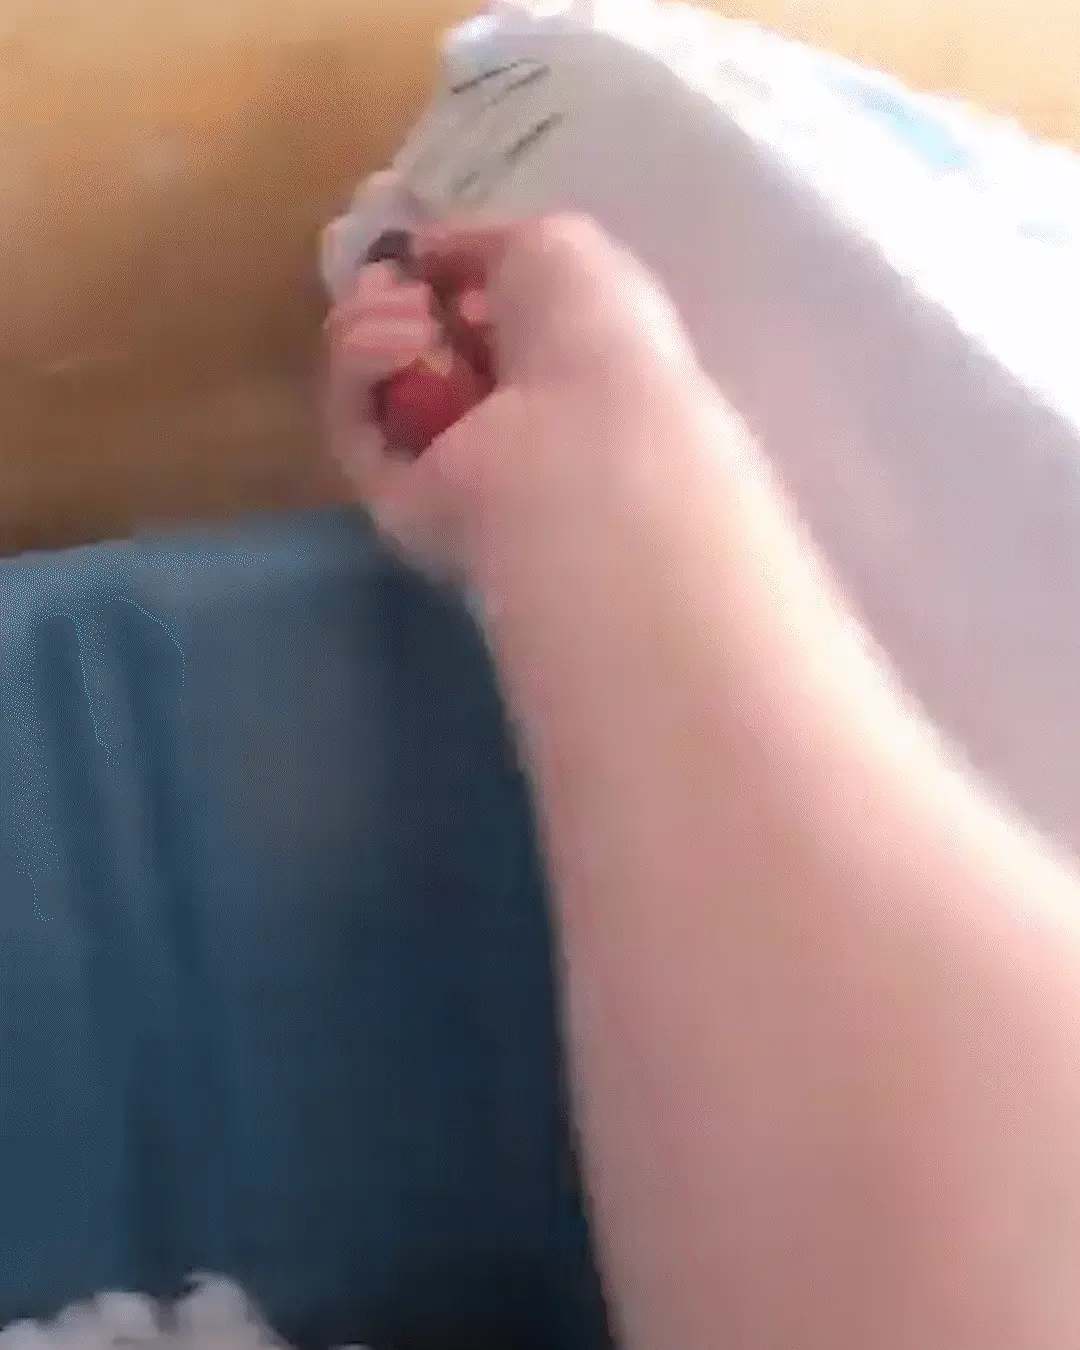
5. Patch up the holes
If the holes are drilled on the inside we will patch the holes with an insulated plug and one coat of spackle. The patch will need some more work before paint. We offer an add on to finish the patches and paint as well. If the holes were drilled on the outside, we will plug the holes with an insulated plug and water proofing tape then reinstall that row of siding. It is possible for there to be slight cracking in the siding, especially with older siding.
6. Clean up
The last step is one of the most important, making sure there is no trace of us! Before starting we set up plastic over all furniture and cover the floors with drop cloths. We clean up and dispose of all plastic and make sure everything is vacuumed up really good before we leave.
What Kind of Insulation Should Be Used In Wall Insulation?
We use modern fiberglass blown in insulation. Fiberglass sometimes has a bad reputation, but the new fiberglass products are very safe and have high performance compared to old products and other products on the market.
The bags come in tightly wrapped compressed bags. We cut the bags open and feed them into a machine called a blower. The blower blends up the insulation, turning it into much finer particles then it is blown through a hose with pressurized air into the wall cavity. The air finds all of the empty space in the wall and fills it tight with insulation. The nozzles we use have a special filtered value to allow assess air to escape the wall cavity once it delivers the insulation. Our blowers are high powered and have the adjustable settings needed to reach the required specifications for dense packing in walls.
The fiberglass loose fill insulation we use has a higher Rvalue than batt or rolled insulation and will fill the entire cavity regardless of the stud spacing, cross bracing, electrical, or plumbing obstructions in the wall. The loose insulation fits around all obstructions in with the wall.
Injection Foam Inside of Walls
We don't use injection foam. Injection foam follows a similar process but instead of installing a loose insulation product it installs an expanding foam. Injection foam is similar to spray foam. The process consists of mixing two highly noxious chemicals together to create an expanding foam that is injected into the walls. The mixing and installation process is very complicated and often overly simplified for marketing purposes. Here is what is needed to mix foam properly:
1. The foam needs to be mixed at a perfect 50-50 ratio
2. The foam needs to be heated within the correct temperature range when mixed
3. The surface inside of the wall needs to be a certain temperature and humidity
4. The foam needs to be the correct temperature when installed
If the foam is mixed and applied perfectly, usually the residents of the house need to leave for safety reasons for at least 3 days since the chemicals are so toxic. If any step of the foam mixing or applying is done incorrectly then the foam will not perform as expected and could never fully cure, leading to the foam off gassing dangerous chemicals indefinitely. This work is done by workers in the back of a truck on job sites, so it's not always a controlled environment.
Pros and Cons of Fiberglass vs. Injection Foam
Fiberglass
Pros:
- Is is usually more affordable than foam
- Does not off gas dangerous chemicals for any period of time
- Settles/shrinks less than 1% over 20 years
- Is still possible to run wires and pipes
- Absorbs sound/has great sound proofing qualities
- Easy to remove in the future
- Vapor permeable
- Easy to remove in future
Cons:
- Needs a bigger hole for installation
- Has a lower Rvalue than properly installed foam
- While it does slow air movement, it does not fully air seal
Injection Foam
Pros:
- Has a high Rvalue if properly Installed
- Can have some air sealing properties if mixed and installed correctly
Cons:
- Easy and common to mix and install incorrectly
- Will off gas dangerous chemicals for approximately 3 days even if mixed and installed properly
- Can off gas dangerous chemicals for extended periods of time when mixed or installed incorrectly
- Is prone to shrinking over time, even when mixed/installed correctly, which lets the cold air bypass the foam
- Can expand too much and pop off walls. Technicians can't control the expansion after it is installed
- Can not run wires or pipes through walls
- Difficult to remove in the future
- Vapor impermeable
- Can hide leaks and issues inside of walls
Frequently Asked Questions About Retrofit Wall Insulation
Red Flags
Insulating Through Brick or Masonry
Sometimes companies will say they can insulate walls from a brick or masonry exterior. While this is possible it causes a lot of damage that will never match perfectly again, even with a skilled mason. In order for it to be possible to patch, the holes need to be made in only the mortar, which is the lines in between the brick. The problem is, that hole is so small it is not possible to get enough insulation through a hole that size, and if it was, it is difficult to match mortar colors, even for skilled masons.
Low Prices
Retrofitting insulation inside of walls is a lot of work and takes a lot of material. Low prices usually are too good to be true, especially if it is injection foam. The raw materials for injection foam and the maintenance on the equipment is very expensive, leading to the work being expensive. When a foam price is less or similar to a fiberglass or similar price, they might not be doing everything that claim.
Since you can't see inside of the walls, it is very important to make sure the company you hire is reputable and is going to do the work they claim. We have been hired after some other companies worked on houses and have found completely empty walls that were supposed to be insulated.
Not Performing a Thorough Inspection Before The Work
Since we have a lot of experience with the different types of houses in our area, we often know what to expect based on an address. That being said, sometimes insulating inside of existing walls is not possible, so they always need to be looked at before.
If someone doesn't look into the wall or inspect in detail, they might be more interested in signing a deal than how well installing insulation will function.
It can, but it is unlikely with us because we have well trained technicians
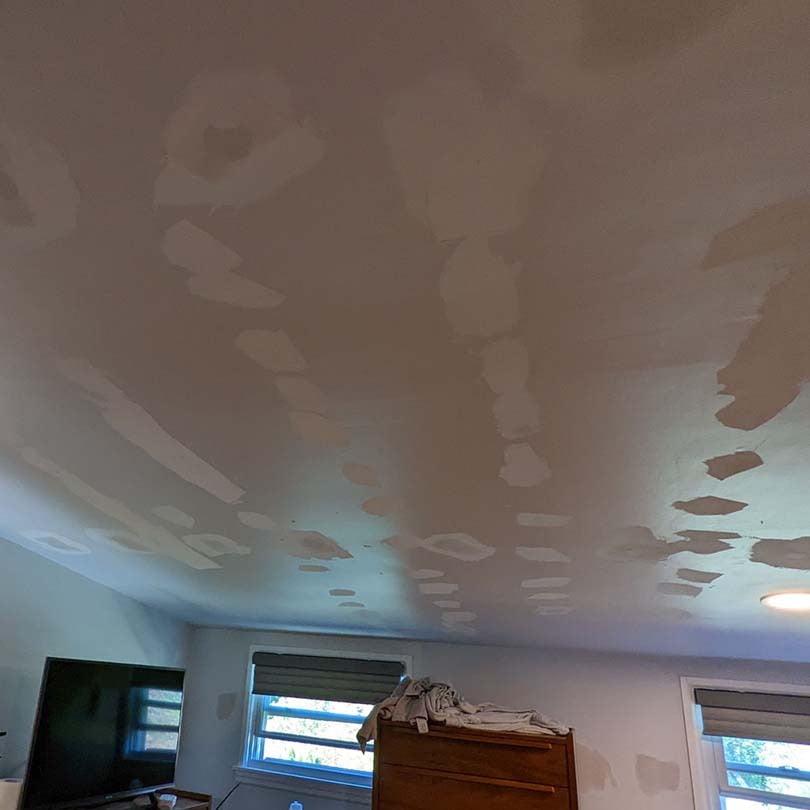
Since this process works by packing insulation into the walls tight with air pressure, it is possible for walls to pop off, crack, or show nail or screw pops. This is something that the technician can control, since they control how much insulation is going in the wall and in what direction. Our installation technicians are trained and have experience with what different types of walls limits are.
Damage will usually only happen when the walls are already in poor condition or if the walls were installed incorrectly. If we notice damage starting to happen, we fully assess the situation to see what our options are. We can usually either install the insulation less tight, stop completely, or reinforce the wall with extra screws. If the client is on the job site we will ask them their preference.
Usually we will install extra screws to stop the walls from flexing or popping off if this is the case. If we need to install screws to reinforce the wall, we will spackle it to the same finish agreed on as the holes for the insulation.
This image shows a clients house where the ceiling was popping off even with the smallest amount of pressure possible. The technicians informed the client and then reinforces the ceiling with drywall screws. This picture shows the result after we applied the agreed on one coat of spackle to everything.
If we are installing the insulation from the outside, it is possible there will be some damage to the siding. Small cracks are common for older more brittle siding. If damage is occurring to the siding, the technicians will point it out to the client and ask if we can drill the holes from the inside instead.